Annex 1#
Installing R (additional screengrabs to support users)#
Download and install R from https://www.r-project.org/ and then install:
In an internet browser window navigate to r-project.org
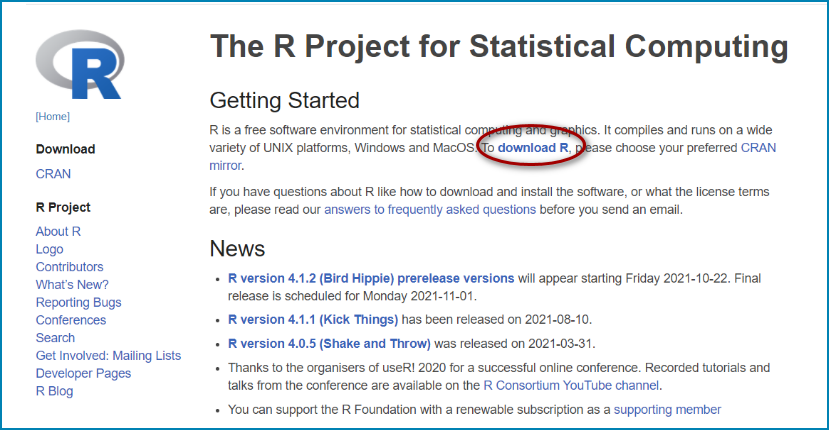
Click on download R
This will take you to https://cran.r-project.org/mirrors.html where you can select the download location for the software depending on where in the world you are located.
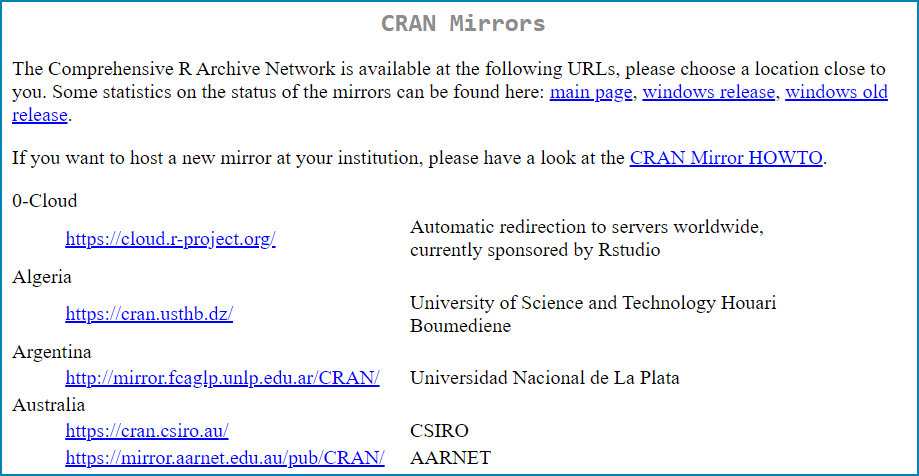

In this example we will navigate to one of the UK CRAN mirror sites.
Click on **https://www.stats.bris.ac.uk/R/**
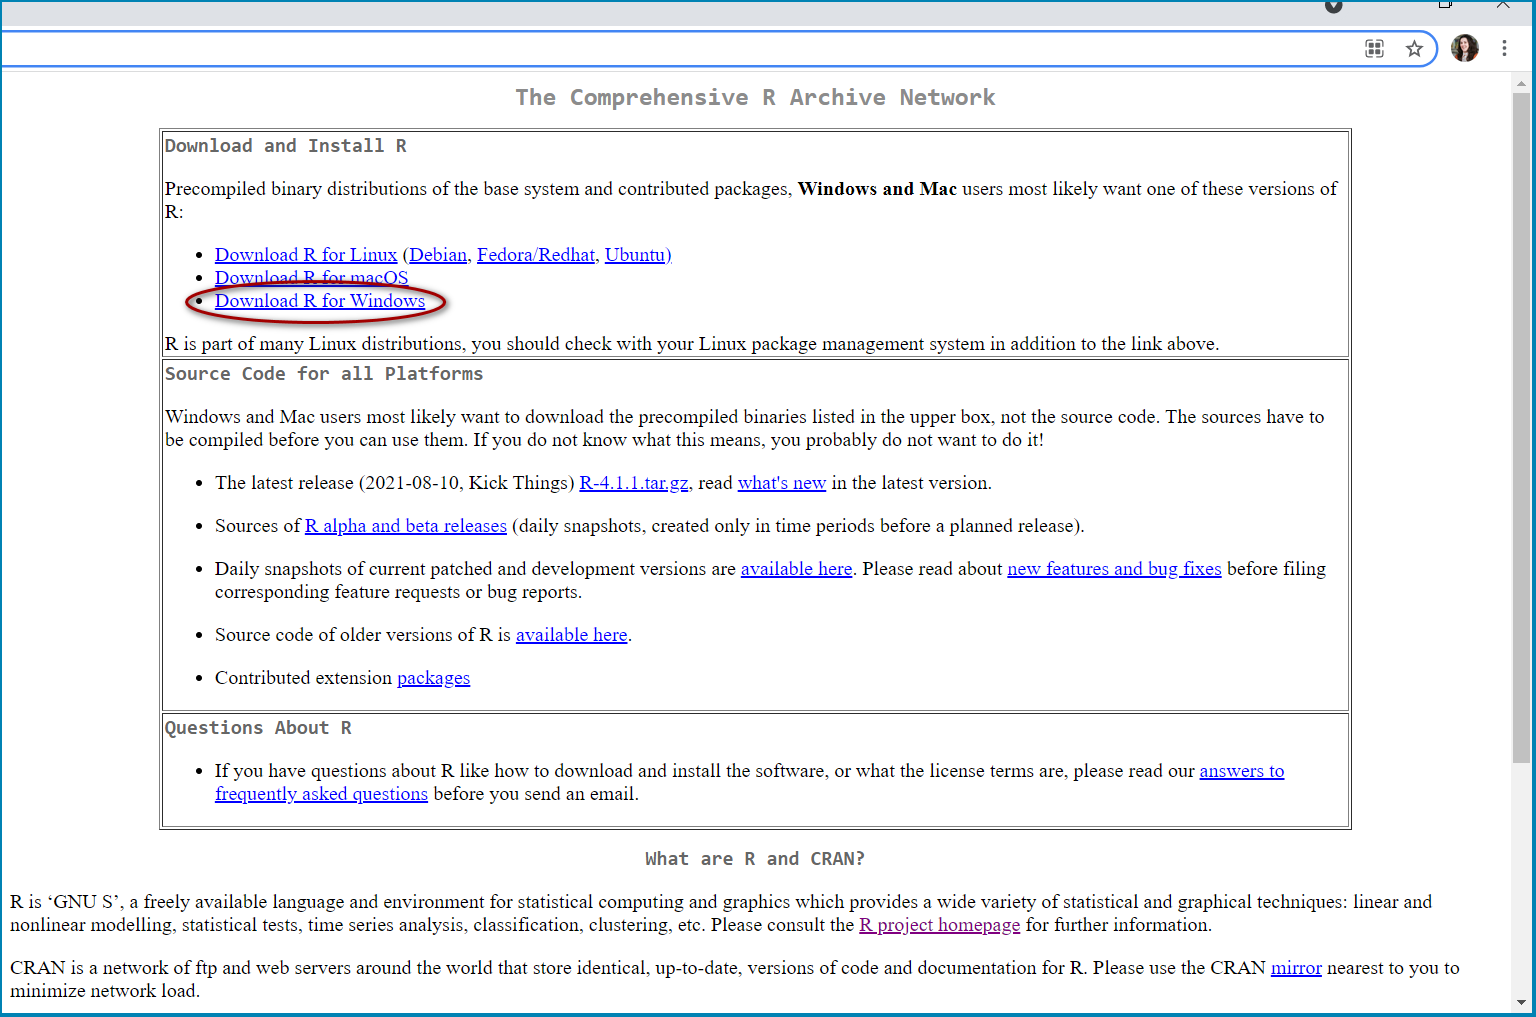
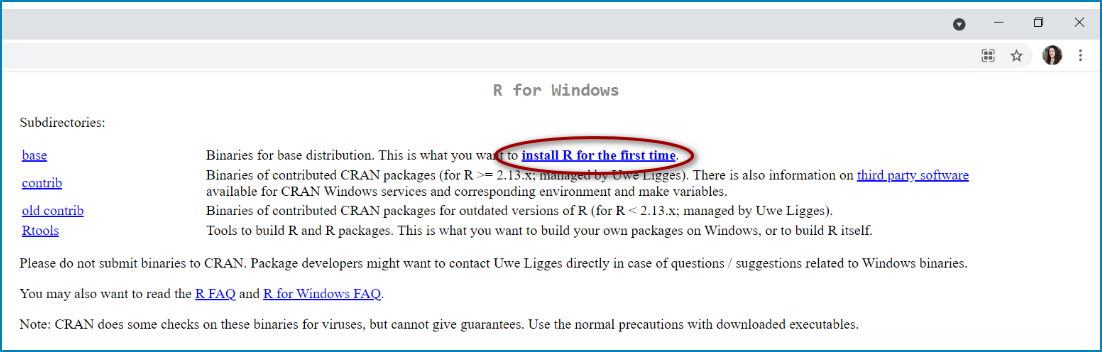
Choose to Install R for the first time. Click on Download R for… (in this example Download R for Windows)
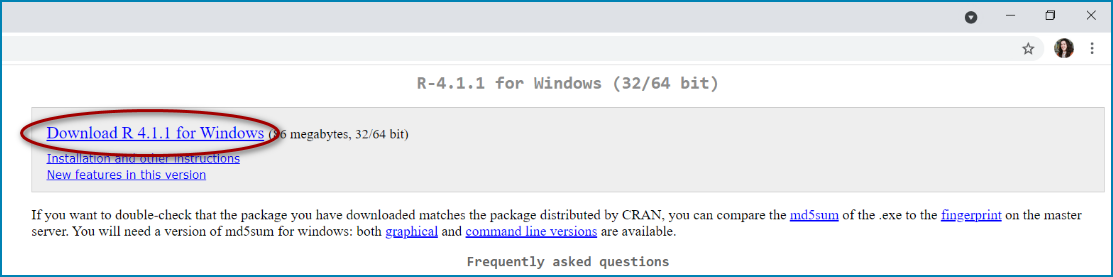
Click to Download R4.1.1 for Windows. If you have an existing install, please refer to the R FAQs. However, it does indicate that the easiest thing for most people is to uninstall the old version of R and do a fresh install of the new version.
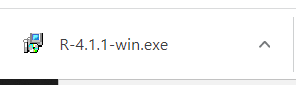
Double click on the installer
 and follow the instructions
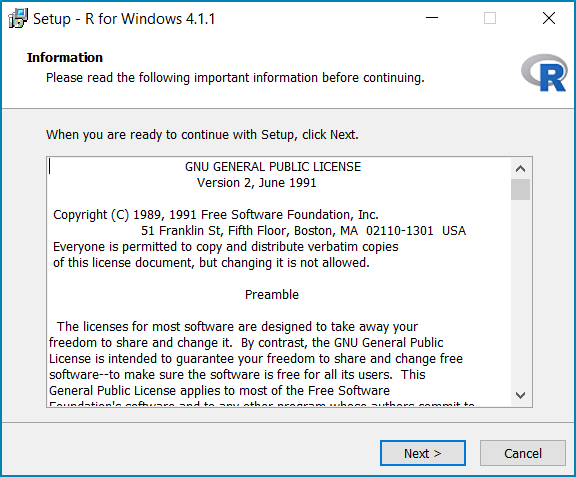
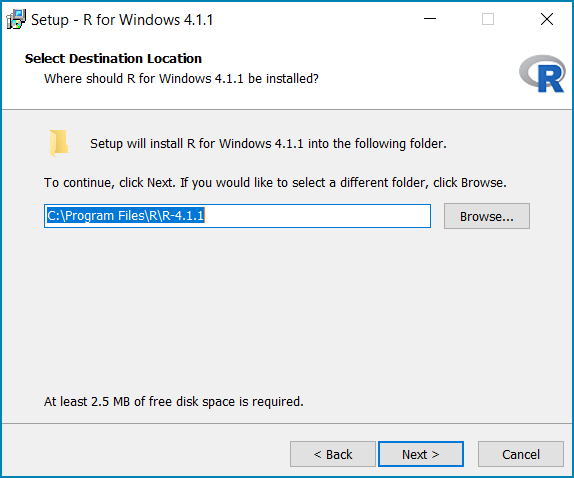
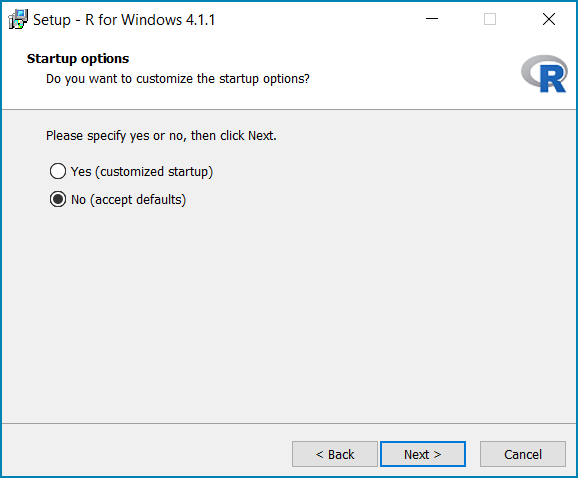
presented in the screen grabs below
and follow the instructions
presented in the screen grabs below
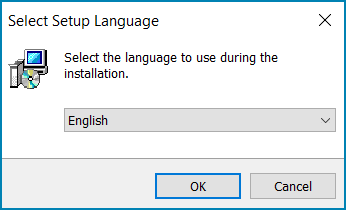
Select language and click ok
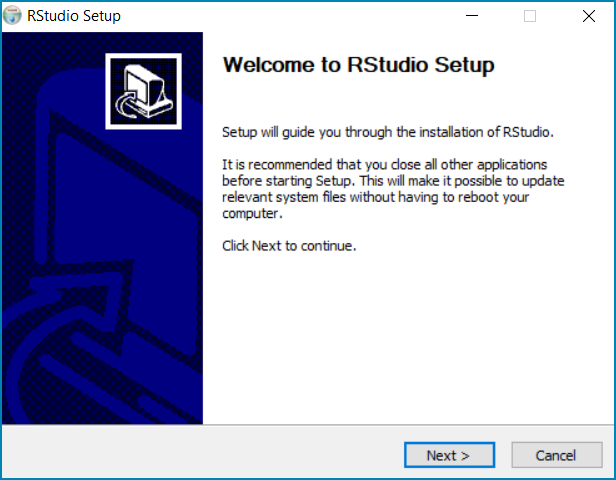
Click Next
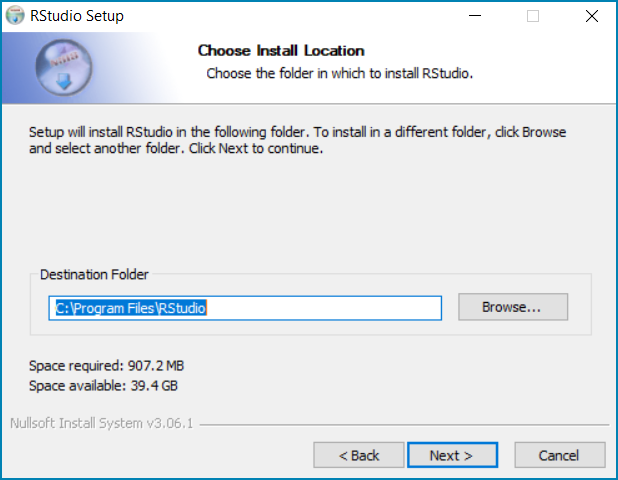
Click Next
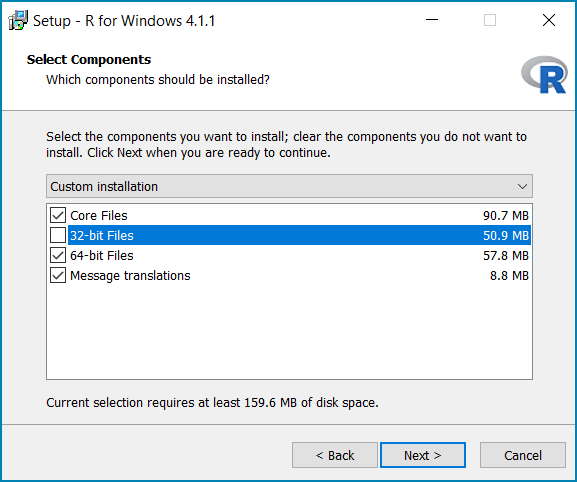
Untick either 32 bit or 64 bit depending on your system. (If you are unsure look at the system information under settings on your PC)
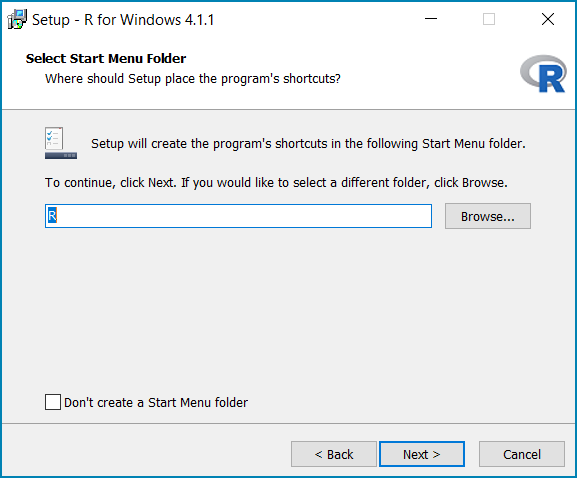
Click Next
Click Next
Click Next
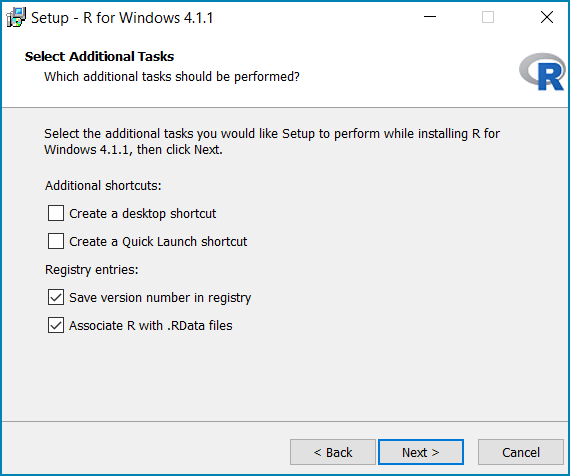
Click Next
Click Finish when the installation is complete
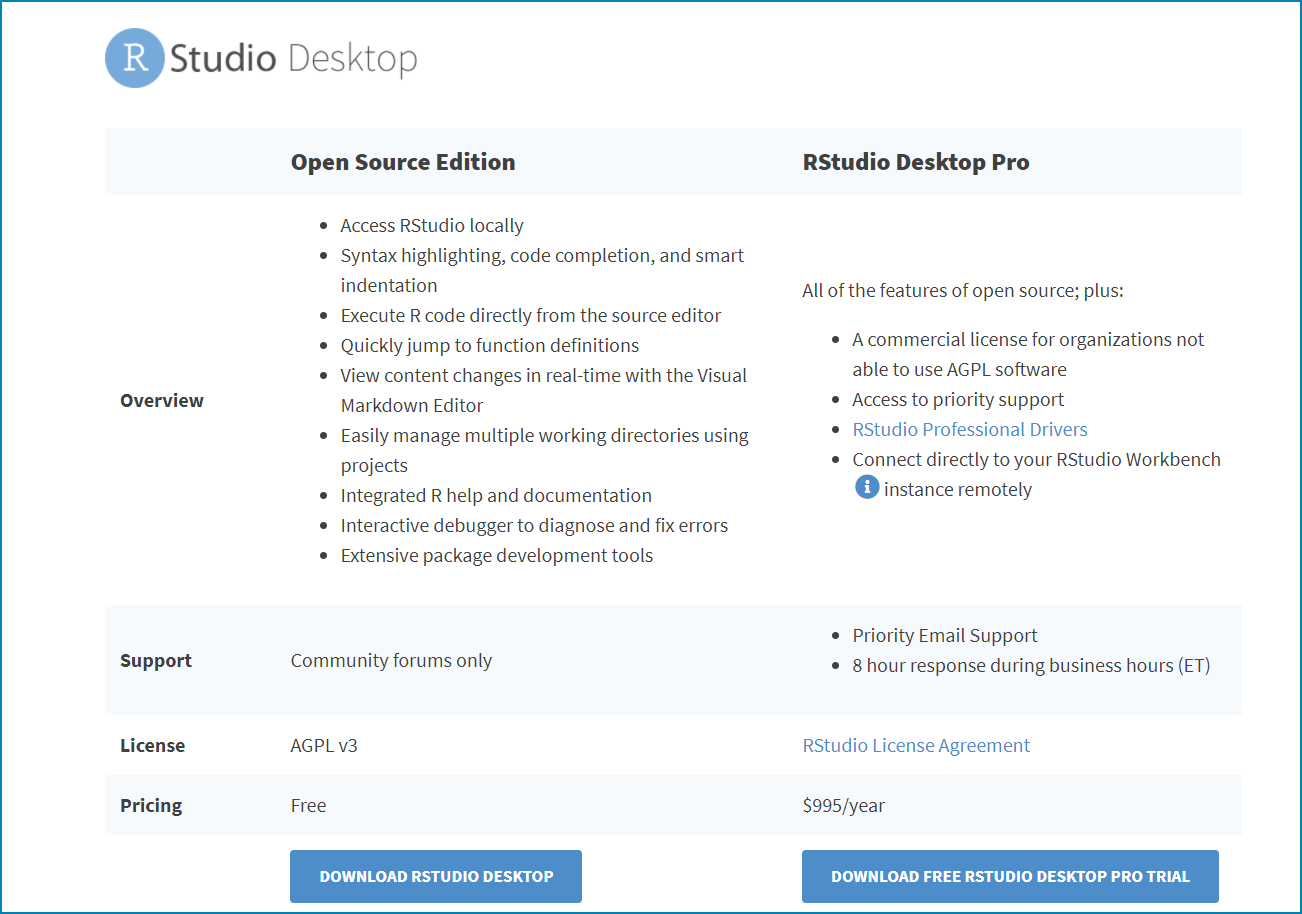
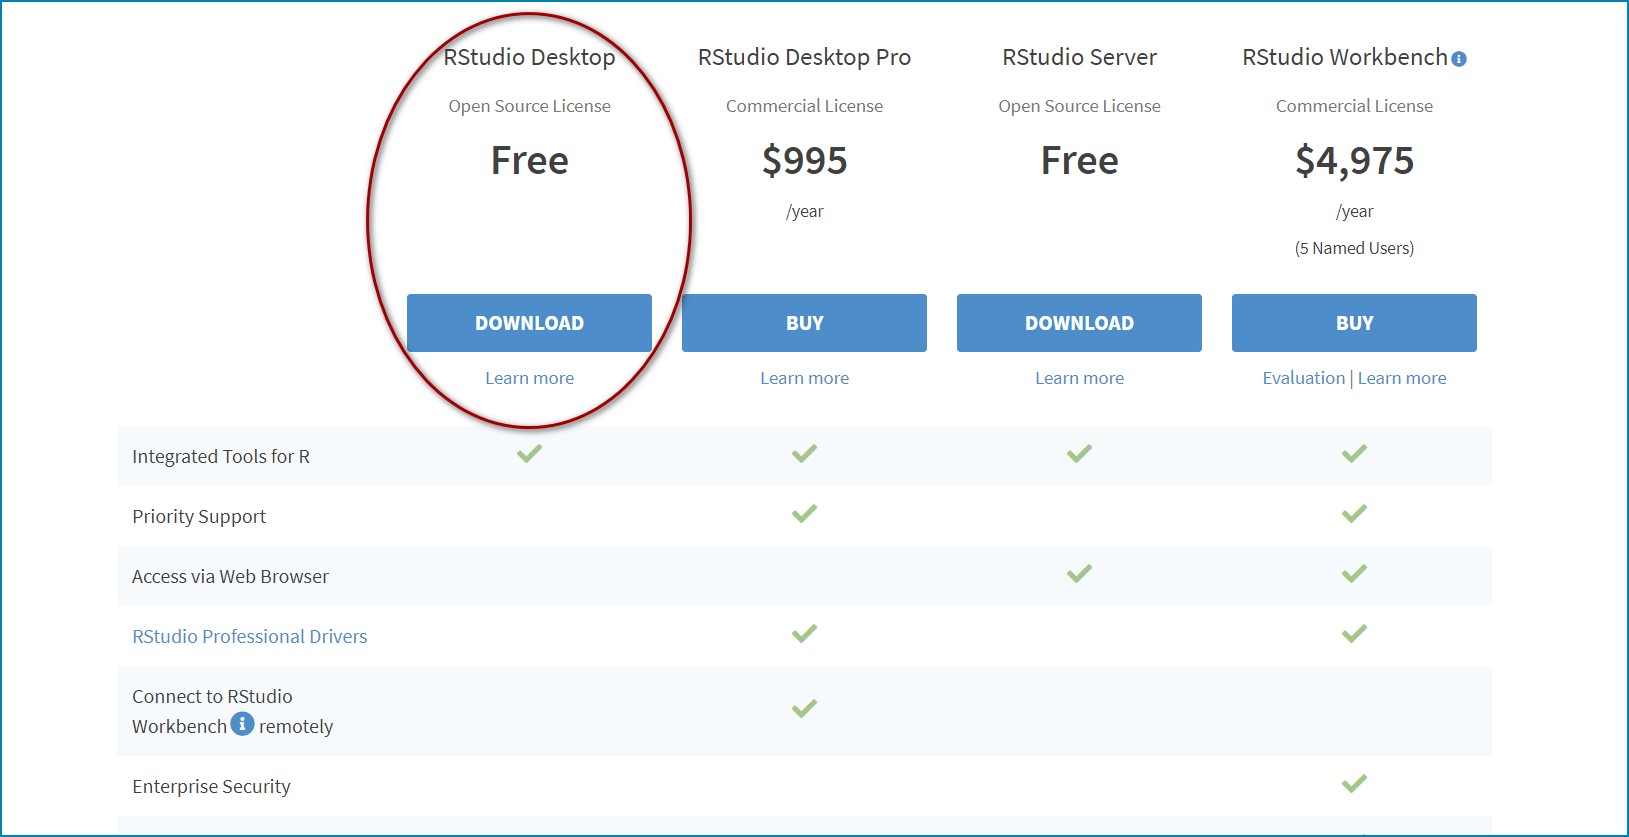
Installing RStudio (additional screengrabs to support users)#
Download and RStudio Desktop from https://www.rstudio.com/products/rstudio/ and then install:
In an internet browser window navigate to **https://www.rstudio.com/products/rstudio/**

Click on RStudio Desktop
Click on download RStudio Desktop
Click to download the Free RStudio Desktop
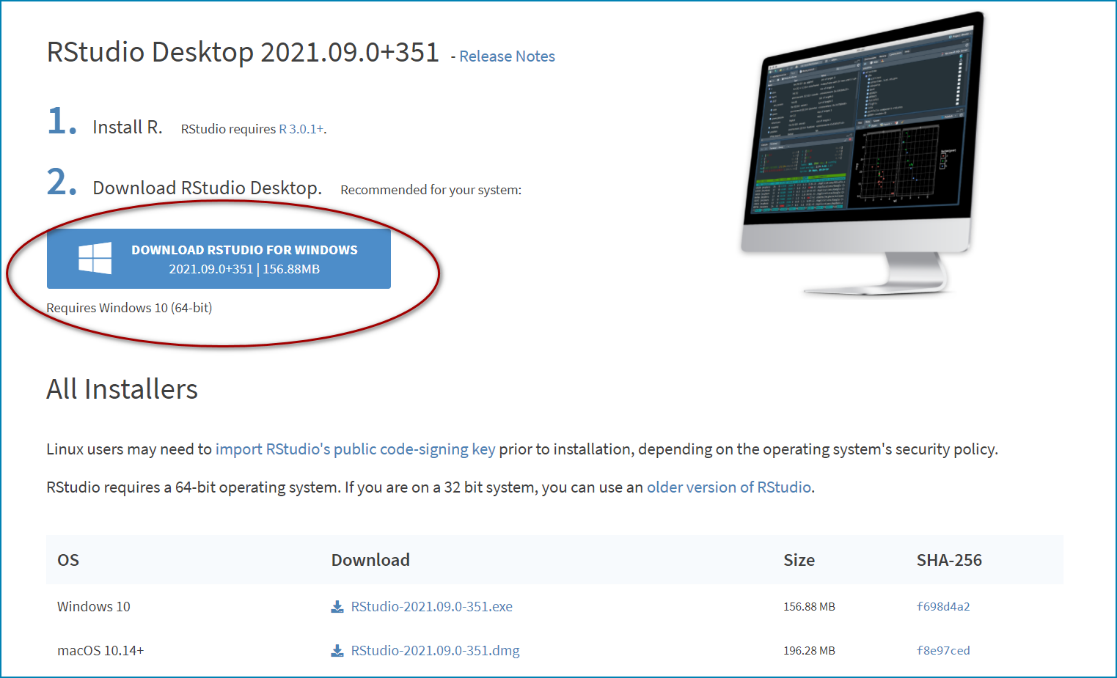
Click Download RStudio for Windows
Double click on the installer
 and follow the instructions
presented in the screen grabs below
and follow the instructions
presented in the screen grabs below
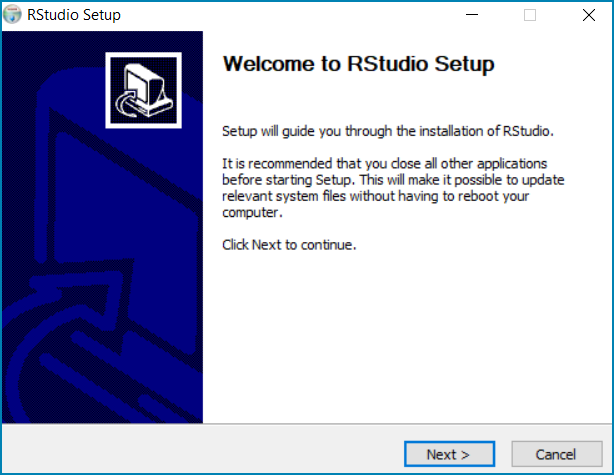
Click Next
Click Next
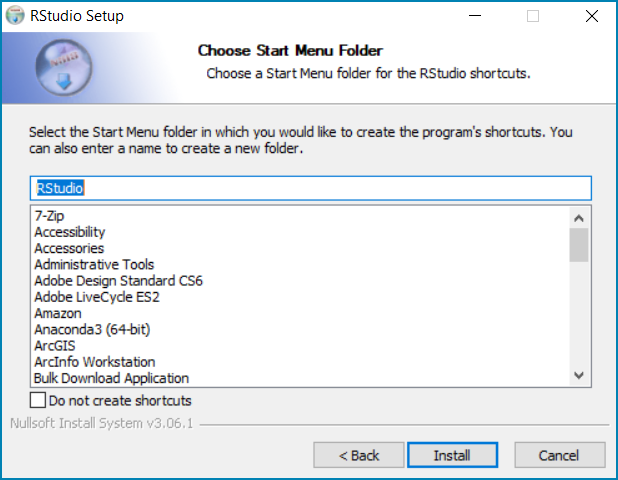
Click Next
Click Install

Click Finish when the installation is complete
What is a DEM?#
Digital Elevation Models represent bare ground topographic surfaces, where trees, buildings and any other surface models are excluded.
These can be created from a variety of sources; older maps were derived from topographic maps. More recently, technologies including high-resolution lidar are used.
Several datasets are now available, these can vary in both temporal and spatial resolution as well as extent.
Accessing DEM data#
- Open topography
Also see QGIS Open Topography DEM downloader
- Copernicus SRTM 30m or 90m
- USGS SRTM (USGS) 30m or 90m
- GMTED: 230m 500m or 1km
- CGIAR SRTM: 90m, 250m, 500m, and 1 km
Bulk download (90m, 250m, 500m, and 1 km): https://drive.google.com/drive/folders/0B_J08t5spvd8RWRmYmtFa2puZEE <https://goo.gl/T9YY2W>
Use in Google Earth Engine: https://developers.google.com/earth-engine/datasets/catalog/CGIAR_SRTM90_V4
Downloading DEM data using the Open Topography DEM downloader#
There is a QGIS plugin that provides access to and a way of downloading some open DEMs. To download the Open Topography DEM downloader go to the main menu and click on Plugins>>Manage and Install Plugins
Search for ‘opentop’
Click on OpenTopography DEM Downloader
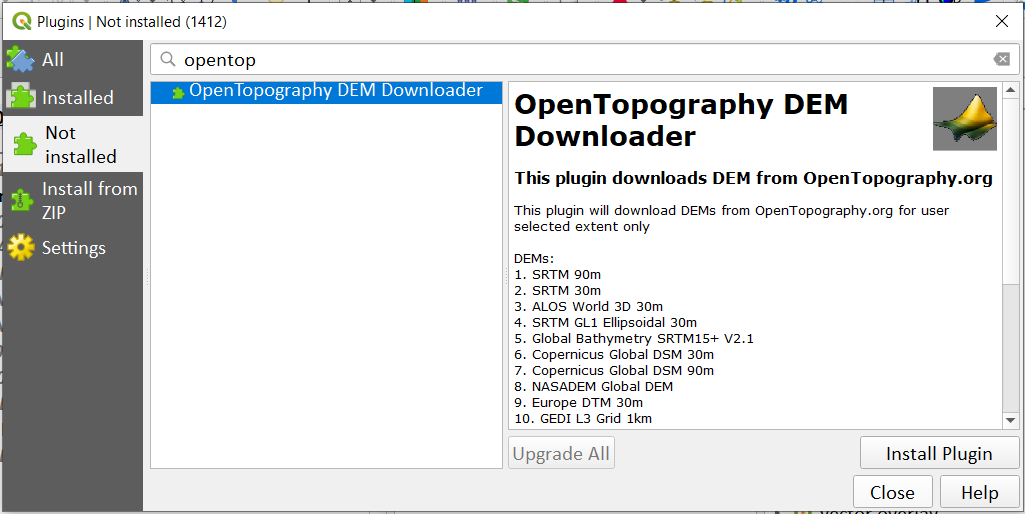
Click install plugin
Once installed click Close
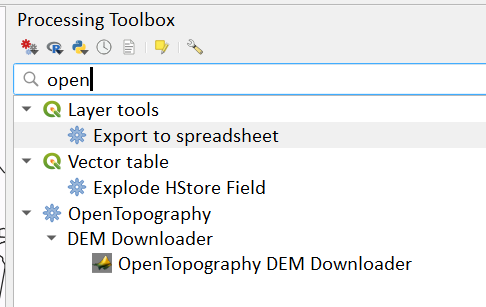
To access the installed plugin go to the ‘Proccessing toolbox’
Search for ‘open’
You should see the OpenTopography DEM Downloader tool
Double-click on OpenTopography DEM Downloader tool
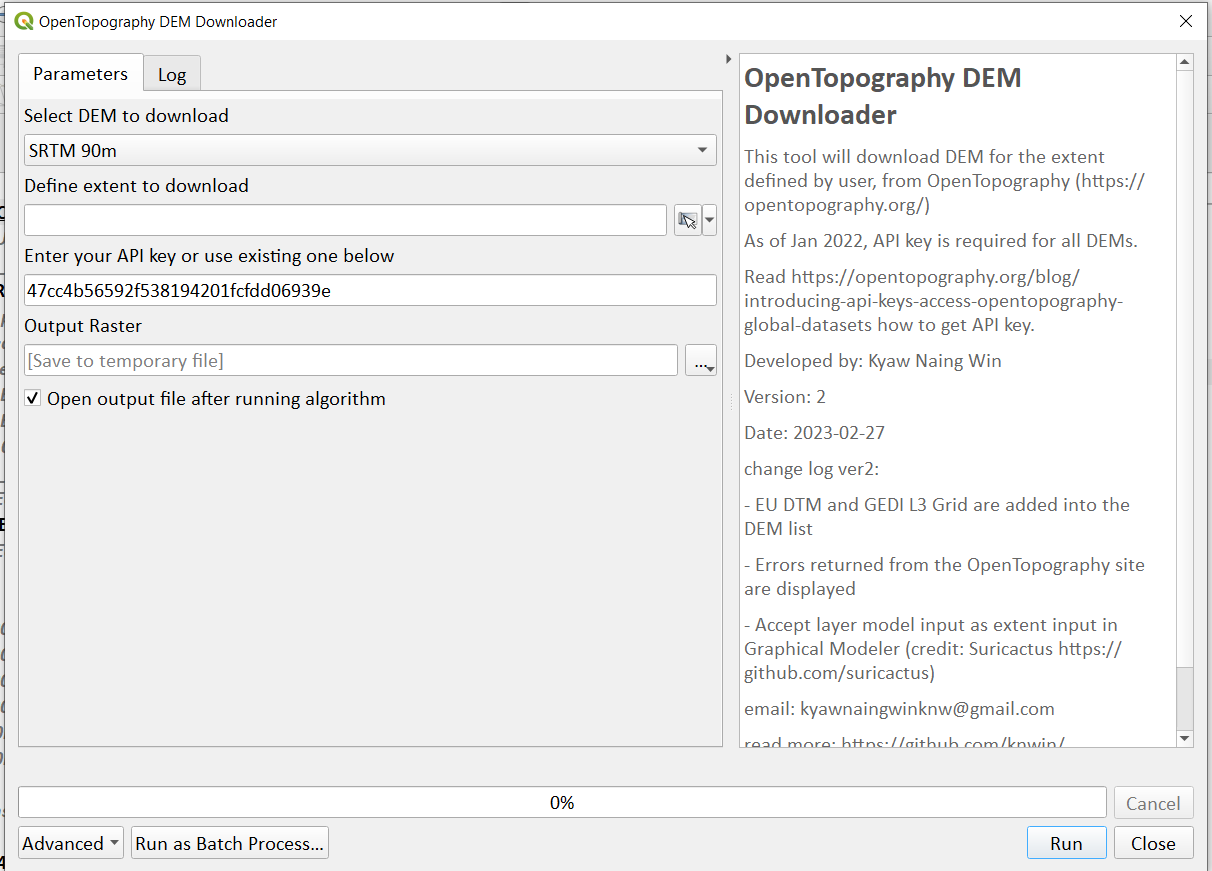
Select DEM to download - choose a DEM of resolution similar to your Land cover dataset. e.g. if your landcover is 300m resolution you should use a DEM that has a cellsize of 300m or lower,
- next define the extent to download. Use the buffeed country boundary layer created in Step A0.
This will ensure correct calculation of the real surface area layer which needs a DEM that goes beyond the boundary of the country as it used surrounding (focal) cells during it’s calculation.
save the output using the following naming convention ISO3_DEM_AOI_EqArea_buffer10km.tif e.g. COL_DEM_AOI_EqArea_buffer10km.tif
Downloading GMTED2010 DEM data from USGS Earth Explorer application#
Before you get started - Bulk Download Application
In order to download a large number of files from the USGS website, a bulk download application is required. To install this on your machine, go to https://dds.cr.usgs.gov/bulk and follow the instructions.
When downloading the USGS Bulk Download Application, you may come across an error saying the application could not find a Javascript Runtime Environment on your system. You need Java Runtime Environment to be installed on your system prior to download. However, this error may occur even if you have the program installed on your operating system. If this is the case, please follow these steps at the end of this section.
N.B If you have a 64 Bit Windows operating system, make sure you select ‘Do you have a different operating system?’ on the bulk download page and choose the 64 Bit option.
When installing the Bulk Download Application change the default file path from C:Programsbda to just C:bda, this helps to avoid errors when opening the application.
Making an account To download data, you must create a USGS account at https://earthexplorer.usgs.gov/. You can do so by clicking the ‘Register’ button in the top right. Follow the instructions and you will receive an email to activate your account. If you already have an account, log in.
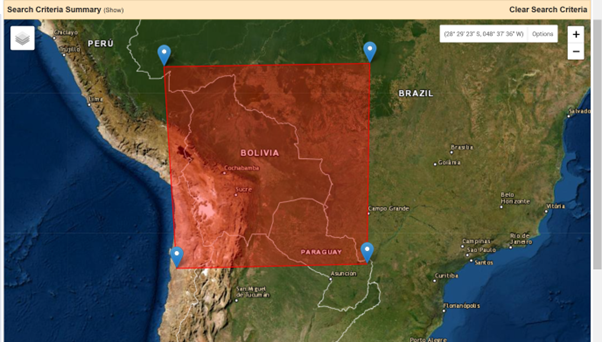
Set your search criteria (setting an area of interest) It is possible to define an Area of Interest (AOI) by double clicking on the map in the browser to create a boundary.
The boundaries and names shown, and the designations used on this map do not imply official endorsement or acceptance by the United Nations.
Double click on the map to draw a boundary, you can add as many points as you wish to draw a custom shape.
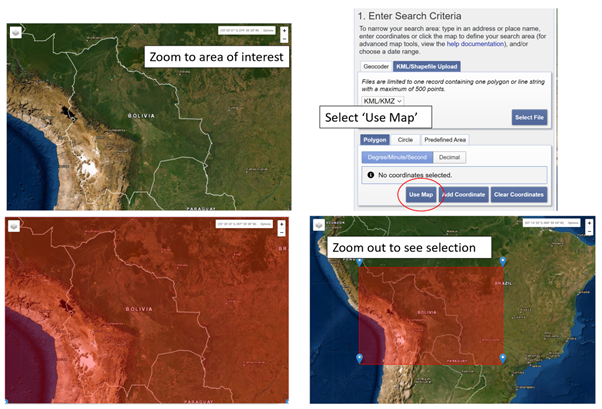
However, it is easiest to simply zoom into your area of interest and select the ‘Use Map’ button which is in the ‘KML/Shapefile Upload’ tab of ‘1. Enter Search Criteria’. When you then zoom out, the AOI should now be shown on your map.
The boundaries and names shown, and the designations used on this map do not imply official endorsement or acceptance by the United Nations.
Using the map extent to select an area of interest.
Within the ‘KML/Shapefile upload’ tab it is also possible to upload a file of your AOI or to enter coordinates.
Select your data to download Select the ‘Datasets’ tab, scroll to the ‘Digital Elevation Model’ section and expand it.
Select the ‘GMTED2010’ option and press the ‘Results’ button on the bottom right of the datasets box .
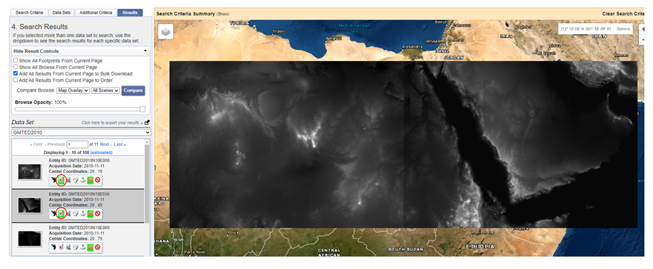
You will now be shown all the results matching your search. Due to the size of the dataset, it is split into 5x5 degree tiles. You can visualise the tiles on the map by selecting the ‘Show browse overlay’ button, the second icon from the left for each tile (Figure XX).
Here you can select the specific imagery you want to download by selecting the relevant tiles. In this case, we will select all tiles as we want to use a global dataset.
The boundaries and names shown, and the designations used on this map do not imply official endorsement or acceptance by the United Nations.
Two tiles resulting from the data search shown on the map, select the icons second from the left to display the data on the map for each tile.
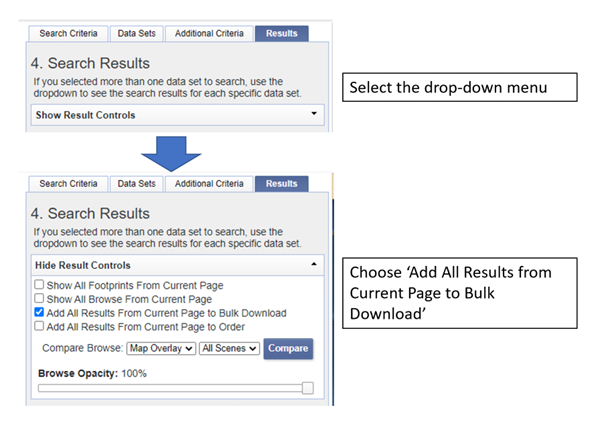
To speed this process up and avoid individually selecting each tile, we can use the ‘Show results controls’ drop-down menu to select the ‘Add All Results from Current Page to Bulk Download’.
Select ‘Add All Results from Current Page to Bulk Download’ to speed up the process of selecting tiles for download.
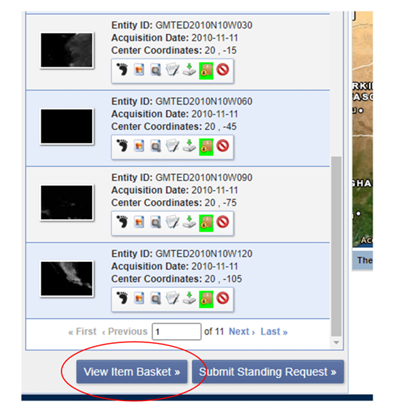
We then need to repeat this for all pages to download the full dataset. Once complete, press the ‘View Item Basket’ button at the bottom of the page.
Once all tiles in the search have been selected, click ‘View Item Basket’ to move to downloading your data.
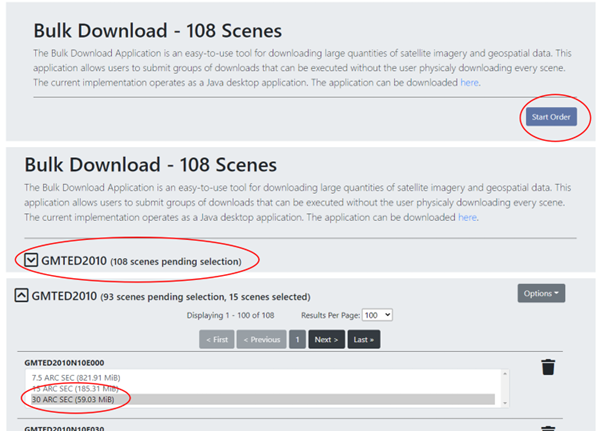
The last step in selecting your data will take you to the Bulk Download page. Select the ‘Start Order’ button.
Select ‘Start Order’ and the GMTED dataset, and then click the ‘30 ARC SEC’ option for each scene.
Before we can download the data, we need to specify the spatial resolution of the data. The GMTED2010 dataset provides several options, 7.5 Arc Seconds (~250m), 15 Arc Seconds (~500m) and 30 Arc Seconds (~1km). As we are using a global dataset, we will download data at the 30 Arc Seconds (~1km) resolution to reduce the file size and computational requirements for working with the data (Figure XX).
For each tile, select the resolution you wish to download e.g. in this example the 30 Arc Sec option.
Scroll down, insert a name (optional) and click “submit product selections”. This submits your order and you will be notified when it is ready to download. If you are downloading a small number of scenes you will be able to download them directly from the website.
There is an option to use the ‘bulk downloader’ but this should not be necessary for country level downloads.
If you have not already installed the ‘Bulk Download Application’ you need to do so at this step following the link on the page. If you have trouble downloading the application, please follow the steps below.
**Using the Bulk Downloader If downloading the global data, or a large number of scenes, you will need to use the Bulk Download Application. This avoids the need to download scenes manually from the website.
Log into the Bulk Download Application and select your order to download. Once selected click ‘Begin Download’.
Open the Bulk Downloader and log in. This will use the same log in credentials as your USGS account. When you log in, you are presented with the datasets you have ordered. Select your dataset and click ‘Begin Download’ . Your datasets will start downloading, this may take some time.
Using the data Once your downloads are complete go to the Bulk Downloader Application in your files.
There should now be a folder with your order name. Inside this, you will find zipped files for each of the scenes you order.
Unzip all of your files using 7-Zip> Extract Here.
Select all of the zipped files in the folder, right click > 7-Zip > ‘Extract Here’. This will start unzipping all of your files.
There are multiple variations of each scene (mean, min, max, standard deviation etc.). Here, we are interested in using only the mean values. In the folder with the unzipped tifs, create an empty folder called ‘means’. We need to copy only the mean tifs into this folder.
To do so, open the command prompt by searching for it in your computer change the directory to the folder with all your unzipped tifs by typing:
‘‘cd /d C:bdaglobalDEM_test‘‘ (after /d replace with your file path)
Once your working directory is set, type:
‘‘Xcopy mea C:bdaglobalDEM_testmeans‘‘ (using your file path to the empty ‘means folder’.
Press enter and the command should run, resulting in all the means tifs being in their own folder.


Downloading DEM data from Copernicus#
Install the AWS cli client for free https://aws.amazon.com/cli/
Full instructions for the command line interface are here https://docs.aws.amazon.com/cli/latest/userguide/cli-chap-welcome.html
Open a windows cmd prompt and check it is installed correctly by typing aws –version
aws s3 cp s3://copernicus-dem-30m/tileList.txt test.txt –no-sign-request
aws s3 cp s3://copernicus-dem-90m/tileList.txt test.txt –no-sign-request
see https://copernicus-dem-30m.s3.amazonaws.com/readme.html
download the tile boundaries for ease of identifying tiles of interest
add dem tiles boundaries to QGIS as vector layers
add in gaul admin boundaries and zoom to area of interest
select tiles covering area of interest. Make sure tiles cover all country boundary
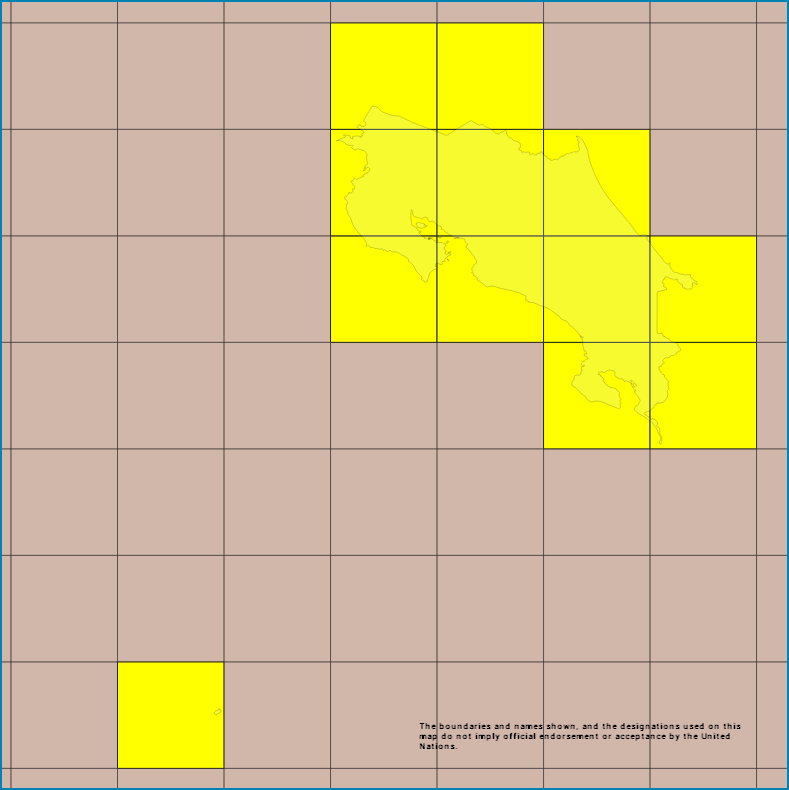
The boundaries and names shown, and the designations used on this map do not imply official endorsement or acceptance by the United Nations.
Right click on the layer and show attribute table
Change to show only select features

In this case we have 12 tiles of interest
Copy all the selected rows to clipboard by using Ctrl + C
Paste into excel (adjust row height and column width to see data clearly
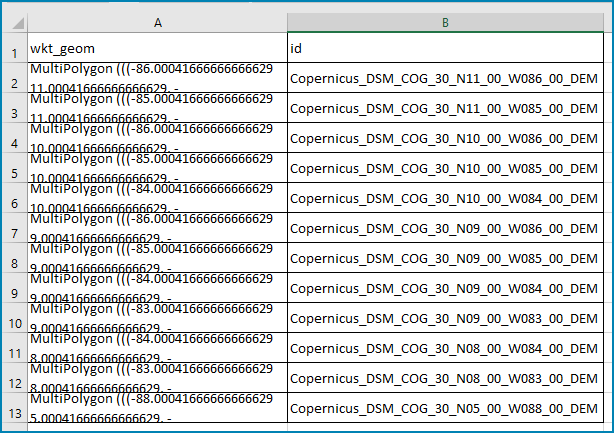
Column b contains all the tile names you need to get from the AWS
Delete column A and row1 containing the headers
Now in cell B1 type the following formula:
For 30m:
=”aws s3 cp s3://copernicus-dem-30m/”&A1&”/”&A1&”.tif”&” “& A1&”.tif –no-sign-request”
Or for 90m:
=”aws s3 cp s3://copernicus-dem-90m/”&A1&”/”&A1&”.tif”&” “& A1&”.tif –no-sign-request”
And double click on the cell to copy the formula to the rest of the tile rows
Output should look like this

Now copy the cells in column b cells and paste into the command prompt window
The DEM tiles should now be downloaded.
Mosaicking DEM tile files using OSGeo4W Shell#
If you country covers more than one DEM tile, you will need to stitch all of these files together into one dataset. There are several options for doing this, you may wish to use the tools in your QGIS software (e.g. the GDAL ‘Merge’ tool). However, it may be quicker to use command line programmes.
In your computer, search for ‘OSGeo4W Shell’ and open the application (N.B. you may need to download this application, if you already have a GIS application such as QGIS you should already have it). This should open a blank command prompt window.
First, set your working directory to your folder with all your means .tifs: ‘‘cd /d C:bdaglobalDEM_testmeans‘‘ (after /d replace with your file path to the means folder)
Then type:
‘‘gdalbuildvrt mosaic.vrt *.tif‘‘
This creates a virtual mosaic of all the tiffs in the folder where you have executed the command. To create a mosaic from the virtual raster, type:
‘‘gdal_translate virtual_mosaic.vrt mosaic.tif‘‘ (you can replace the final ‘mosaic’ with your chosen file name).
Press enter and once the command has finished running, you should find your mosaic raster in the folder. Now you have a global raster ready to use in your analysis!