
Module requirements#
Initial setup#
SEPAL is closely linked to Google Earth Engine (GEE) – a Google-powered Earth-observation cloud-computing platform – as it builds upon many of its functionalities. This means that to run the SEPAL-SDG 15.4.2 tool, you will need to connect your SEPAL and GEE accounts.
Before getting started with SEPAL-SDG 15.4.2, you need to:
create a SEPAL account (see this article), then familiarize yourself with the tool by exploring its interface;
create a Google Earth Engine (GEE) account (see this article), then initialize the home folder; and
connect your SEPAL and GEE accounts (see this article
Data requirements#
SDG Indicator 15.4.2 requires several spatial data inputs to be computed, namely:
Mountain Area Map
For the purposes of standardization and international comparability of indicator values, SDG Indicator 15.4.2 adheres to the UNEP-WCMC mountain definition (UNEP-WCMC, 2002). The UNEP-WCMC method defines total global mountain area as the sum of seven classes (commonly known as Kapos mountain classes), based on elevation, slope and local elevation range parameters. This mountain area is subdivided into bioclimatic belts (Nival, Alpine, Montane, Remaining Mountain Area) based on average temperatures as defined by Körner et al. (2011). A global mountain area map based on these definitions and methodologies has been developed by FAO and is used by default by SEPAL-SDG 15.4.2 as part of the computations.
National Administrative Boundary for the country of interest
SEPAL-SDG 15.4.2 has been conceived to facilitate the computation of SDG Indicator 15.4.2 at country level. To facilitate this, the tool uses a default global data source for national boundaries: the FAO GAUL Global Administrative Unit Layers 2015 dataset. However, the tool also allows national agencies to use their own national country boundary layer if available.
Collection of Land Cover Maps for the country of interest
Land cover maps spatially represent the physical coverage of the Earth’s surface into different types (classes), such as forests, grasslands, croplands, lakes and wetlands. This data serves different functions for SDG Indicator 15.4.2:
In Sub-Indicator 15.4.2a, land cover is used to categorize land into green and non-green cover areas.
In Sub-Indicator 15.4.2b, land cover is used to identify areas where changes in the type of land cover may indicate a decline or loss of biodiversity, mountain ecosystem functions or services that are considered desirable in a local or national context.
The collection of land cover maps to compute this indicator should be available from the year 2000. SEPAL SDG 15.4.2 beta allows national authorities to use relevant national or regional land cover datasets.
Similar to the national administrative boundary dataset, SEPAL-SDG 15.4.2 provides access to default land cover datasets selected by FAO to compute the indicator when national datasets are not available (see the :ref:`Data Sources section <DataSources>`_).
Note
Country-defined datasets must be made available as GEE assets as an image collection for SEPAL-SDG 15.4.2 to access it. This will be demonstrated in the next section of the tutorial.
Uploading files into Google Earth Engine#
After creating and linking accounts in SEPAL and GEE, you can upload files into GEE.
GEE accepts a number of data formats, namely: shapefiles, raster images, and .csv tables. This section will demonstrate how to upload different types of data into the platform.
To upload files, go to the Assets tab in the upper-left panel on the Earth Engine Code Editor page. Selecting it will open the Asset manager (as shown below):
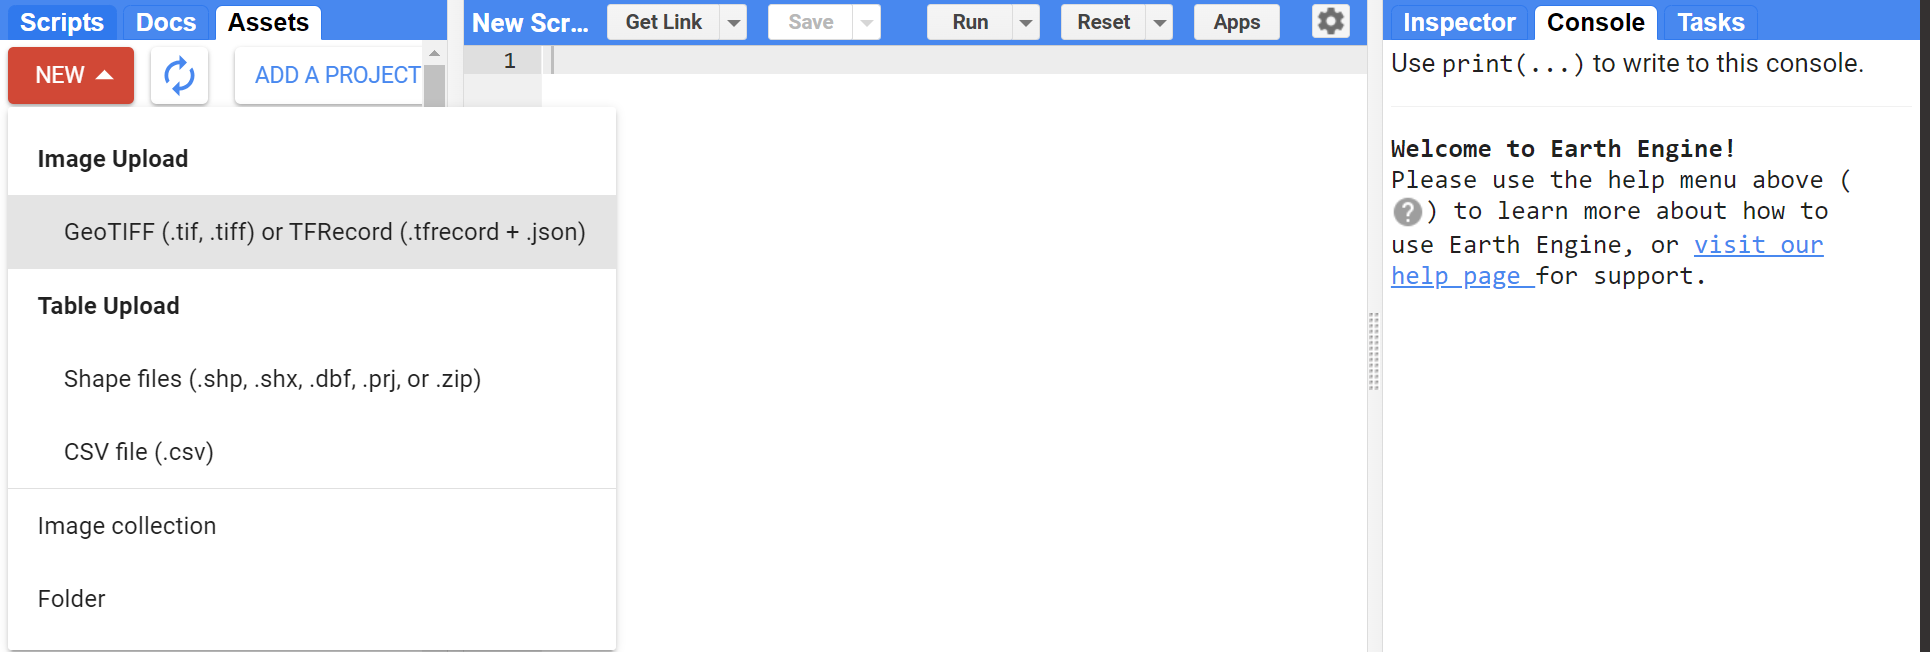
Selecting the New button will list the acceptable options, including Raster (Geotiffs or TFRecords), Vector (Shapefiles) and Data tables (.csv files), which will be described in the following subsections.
2.1.Uploading vector files#
Note
In SEPAL-SDG 15.4.2, custom country boundaries need to be uploaded in vector format.
To do so, choose the Shapefiles option in the dropdown list. A pop-up window will appear prompting you to navigate to the location of your data.
Select the file you want to upload from your computer. You can either upload the vector data as a compressed
.zipor.shp. Remember that a.shpfile alone is not sufficient and must be accompanied with all the other files describing the vector data (i.e..shx,.dbfand.prj).
Any file errors will be highlighted by the uploader, as in the example below:
Once all files are loaded correctly, the upload progress is displayed in the Task manager. This process typically takes a couple of minutes, depending on the size of the dataset. The progress of the upload is displayed in the Task manager (as shown below).
Once completed, the uploaded assets will be listed in the Assets list under the Assets tab. If not displayed, select the Refresh button.
Selecting the asset will open an Asset details window; it is ready for use. You can now visualize, share or delete it accordingly.
Uploading raster files#
When computing SDG 15.4.2, land cover maps are uploaded as raster files and made available as image collections to be usable in SEPAL-SDG 15.4.2.
To upload the rasters, select New > Image Upload**.
In the pop-up window, select the file you want to upload from your computer (compatible formats include
.tiff,.tif,.json,.tfrecordor.tfrecord.gz; by default, the asset will be named after the basename, but the name of your asset can be changed in the next text field.
Note
Please ensure that the name includes the reference year of the land cover map (e.g Nepal_2000) for Nepal’s land cover map for 2000.
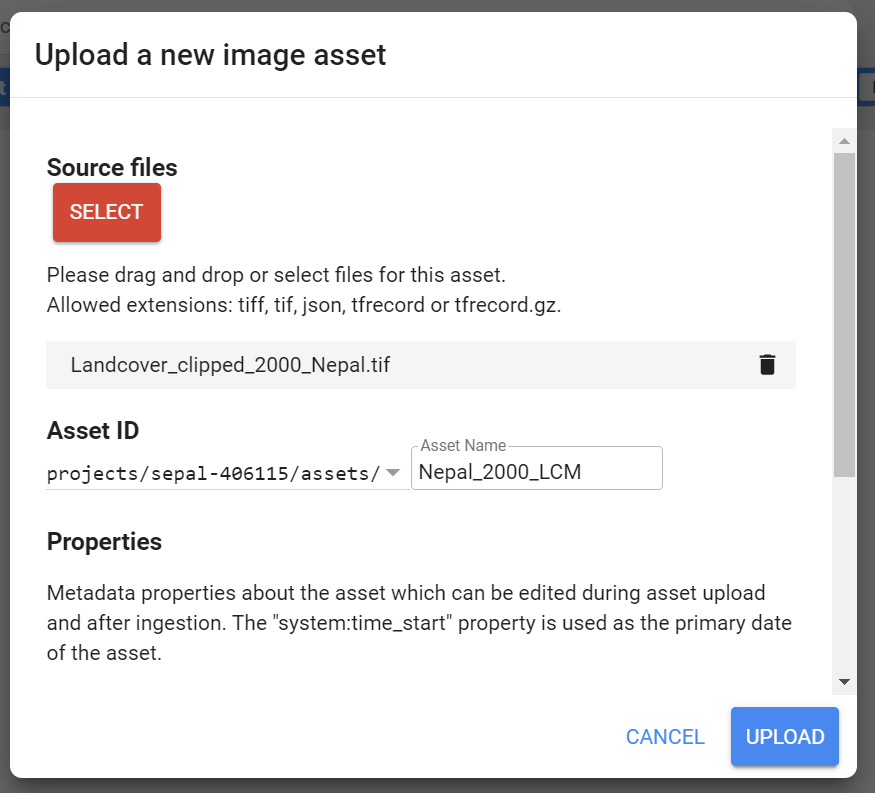
Repeat Step 2 for each of the land cover maps.
Creating an image collection#
An image collection is a stack or sequence of images. Once all the land cover maps have been successfuly uploaded, we now need to create an image collection for the images to be usable in computation.
To create an image collection;
Select the Assets tab and then New > Image collection.
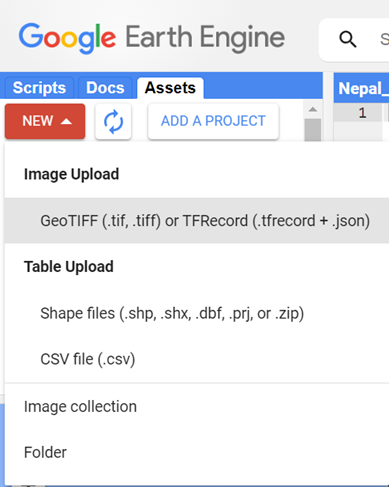
This will open the Image collection constructor that will first prompt you to name your image collection (as shown below).
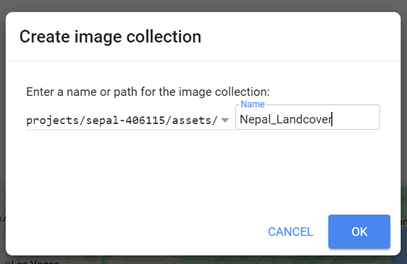
Once the image collection has been created, you can load it by:
pasting an Earth Engine asset ID into the Image Collection constructor (ensure the Edit button is on); or - by dragging the individual assets to the image collection in the Assets list (as shown below).
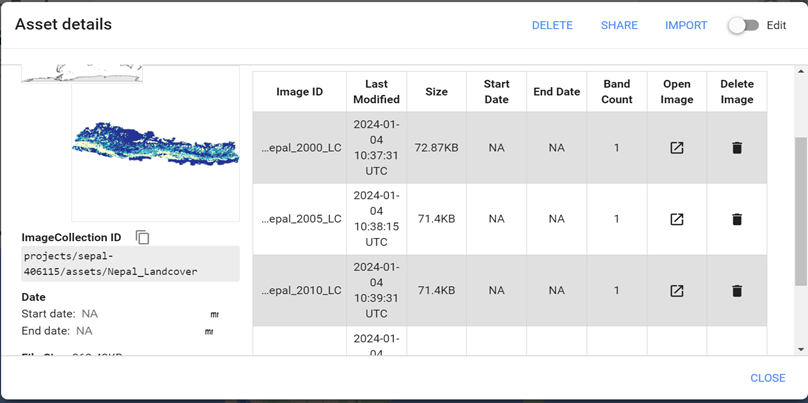
Repeat this for each asset. Selecting the Image collection (in the Assets list) should now show all of the images that are contained in that collection, now ready to be used in your analysis or visualization.
Uploading table files#
Tabular data can be uploaded into GEE as a comma-separated value (.csv) file or Javascript Object Notation(JSON) file (.json). To upload a tabular file:
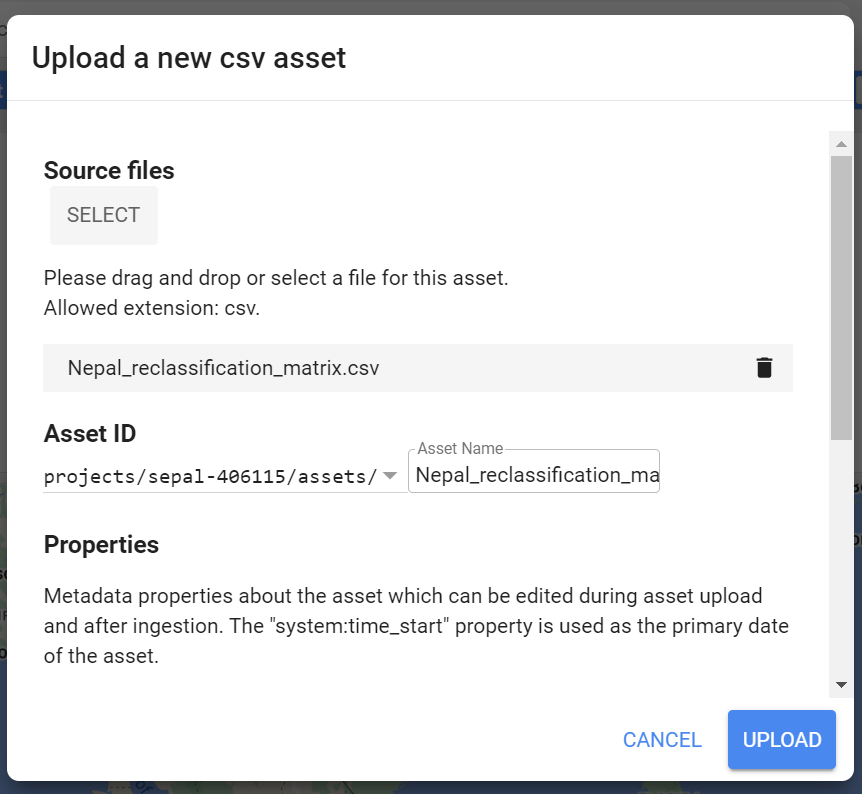
Select New > .csv file upload.
In the pop-up window that appears, select the file you want to upload from your computer.
Tip
Now that all of your files have been uploaded in GEE, you can now access and use your assets in SEPAL. Since you’ve already connected your GEE and SEPAL accounts, all of your assets are synced and available in SEPAL. You will be able to select them from the dropdown list, or copy and paste them directly from GEE when prompted in SEPAL-SDG 15.4.2
Uploading vector files into SEPAL via the Vector file manager#
Apart from GEE, you can directly upload your tabular datasets (vector or .csv tables) into the SEPAL environment through the Vector file manager (for more information, see this article.
Navigate to the Apps tab (located on the left side of the SEPAL interface) and find the Vector file manager by either navigating through the App list or using the Search bar.
Selecting the app opens the Vector file manager (as shown below):
Selecting the dropdown arrow allows you to choose the table type (accepted formats are shapefiles
.shpand table files.csv).Choose the shapefile option. Then select the
📎icon to navigate to your files and choose all appropriate files; select Import.
The Vector file manager notifies you when the importation is complete and shows its location as follows:

To locate the file you have just uploaded into SEPAL, select Module_Results > AOI in the homepage.
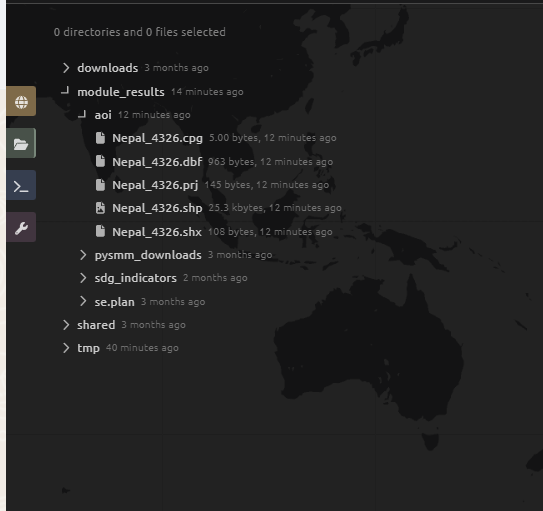
The vector files you just uploaded are now within the SEPAL environment and can be used when required.
See also
The methods explained above should suffice; however, since SEPAL’s built-in tools for uploading and downloading are limited, large amounts of data should be uploaded or downloaded using an FTP solution. For more information, see this article.